Embroidery is fun and creative. But before thread touches fabric, you need a stitch file. Many people think you must buy costly software to make one. That is not always true. There are simple ways to turn artwork into stitch files for free if you learn the right steps.Many beginners search online to Digitize XXX Embroidery Files for Free without knowing how digitizing really works.
They upload a logo and hope for magic. Sometimes it works. Many times, it does not. Free methods can help, but you must understand the limits and follow smart steps.At Embroidery Digitizing Services in USA - Digitizing Buddy, we work with both paid and free tools. We test files on real machines. We fix designs that fail. In this guide, I will share easy and honest ways to create stitch files at no cost, while also explaining when free tools are enough and when expert help may be better.
What Is a Stitch File?
A stitch file is not just a picture. It is a set of commands for your embroidery machine.
It tells the machine:
Where to stitch
What stitch type to use
When to change color
When to trim thread
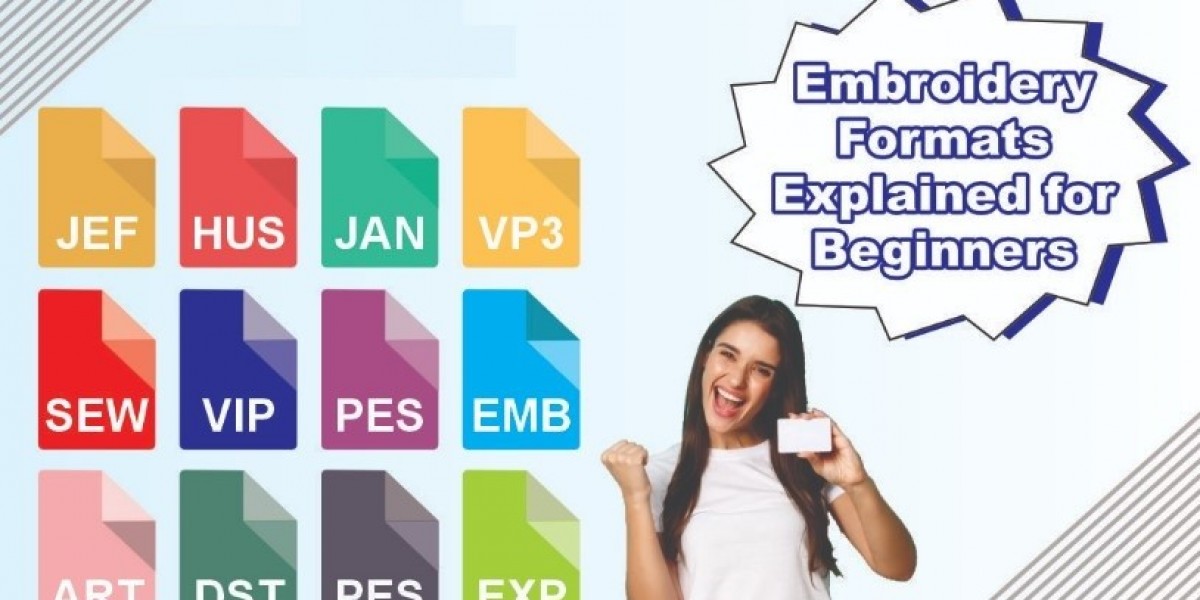
Formats like PES, DST, or EXP hold this stitch data. Your machine reads this data step by step.
If the file is not built well, the machine will still stitch. But the result may look messy.
Can You Really Do It for Free?
Yes, you can. But there are limits.
Free tools work best for:
Simple logos
One or two colors
Basic shapes
Small projects
They may struggle with:
Tiny text
Detailed art
3D puff
Complex shading
Knowing these limits helps you avoid stress.
Step 1: Start With Clean Artwork
Free or paid, this step is the same.
Use Clear Images
Choose a high-quality image. Avoid blurry or pixelated logos.
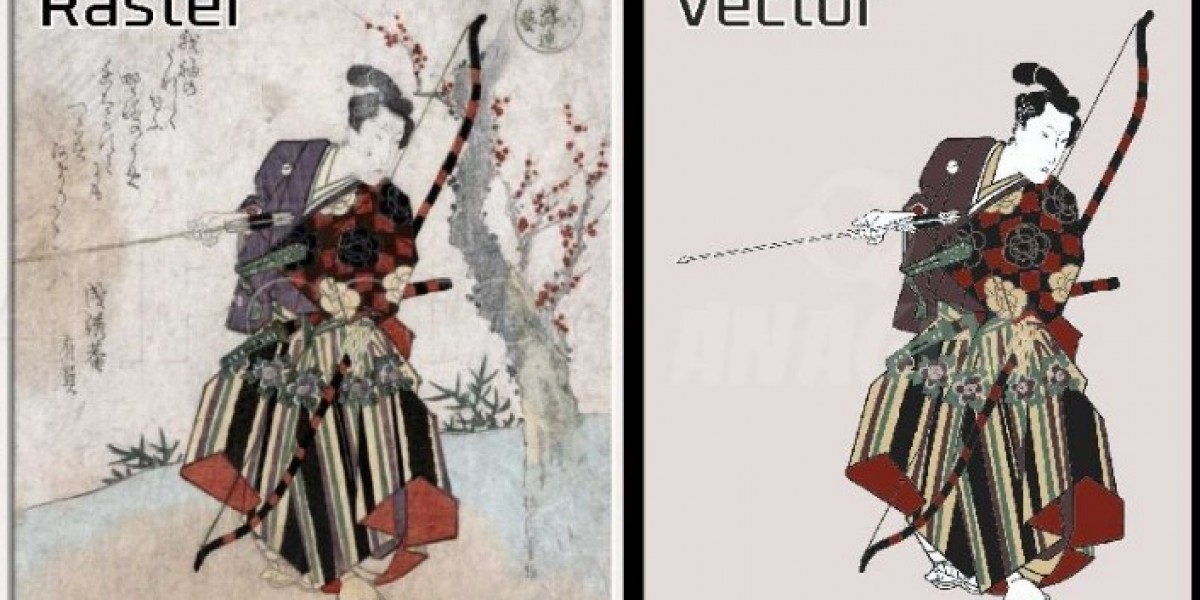
If possible, use vector files like SVG. They are easier to trace and edit.
Simplify Before You Begin
Remove small details.
Remove shadows and gradients.
Use solid colors.
Embroidery likes simple shapes.
Step 2: Use Free Vector Software
Before digitizing, convert your image into vector form.
Try Free Design Tools
Programs like Inkscape are free and helpful. You can:
Trace bitmap images
Clean edges
Adjust shapes
Separate colors
Clean vector art makes digitizing much easier.
Step 3: Use Free Embroidery Software or Trials
Some embroidery programs offer free versions or trial periods.
These tools let you:
Assign stitch types
Set stitch direction
Adjust density
Export machine formats
Always check what export formats are included in the free version.
Step 4: Choose Basic Stitch Types
Keep it simple when using free tools.
Satin Stitch
Use for text and thin shapes.
Make sure letters are not too small.
Fill Stitch
Use for large areas.
Lower the density if fabric feels stiff.
Running Stitch
Use for outlines.
Keep lines thick enough to show clearly.
Avoid advanced effects when using free software.
Step 5: Adjust Size Carefully
Small logos are harder to stitch.
If your design is too small:
Text may vanish
Shapes may merge
Keep beginner designs at least 3 inches wide.
Always confirm final size before export.
Step 6: Add Basic Underlay
Some free programs allow underlay settings. Use them.
Underlay helps:
Hold fabric flat
Support top stitches
Reduce puckering
For knit shirts, use zigzag underlay.
For firm fabric, use edge underlay.
Even basic underlay improves quality.
Step 7: Select the Right Stabilizer
Even a good file fails with wrong stabilizer.
Cut-away for stretch shirts
Tear-away for caps
Wash-away for thin fabric
Stabilizer choice matters as much as digitizing.
Step 8: Test on Scrap Fabric
Testing is key.
Do not stitch first on the final product.
Check for:
Thread breaks
Gaps in fill
Puckering
Poor tension
Make small changes and test again.
From our real shop work at Embroidery Digitizing Services in USA - Digitizing Buddy, testing saves more time than it costs.
Common Free Digitizing Mistakes
Beginners often make these errors:
High stitch density
Too many color changes
Tiny unreadable text
No underlay
Wrong stitch angle
Keep your design simple to avoid these problems.
When Free Methods Are Enough
Free methods are great for:
Hobby projects
School work
Practice designs
Simple monograms
They help you learn how stitches behave.
They build skill and confidence.
When You May Need Expert Help
Free tools have limits.
If your design has:
Small detailed text
Complex logos
Many colors
Special effects
You may need expert digitizing.
At Embroidery Digitizing Services in USA - Digitizing Buddy, we often fix files created with free tools. We adjust stitch paths, density, and angles. This improves quality and reduces thread breaks.
Real Example From Experience
A small shop owner once tried free software for a detailed sports logo.
The result:
Thread broke often
Text looked uneven
Fabric puckered
We rebuilt the file with proper stitch angles and balanced density. The same machine stitched it smoothly after correction.
This shows that tools matter, but knowledge matters more.
Build Skills Step by Step
Start with:
Simple shapes
One or two colors
Large text
Practice often.
Look at both front and back of your stitches. The back shows tension balance.
Each test teaches something new.
Keep Learning and Improving
Watch free tutorials.
Read guides.
Test different fabrics.
Over time, you will understand how stitch direction changes light reflection and how density affects feel.
Skill grows with practice.
Final Thoughts
Turning artwork into stitch files for free is possible. It takes time, patience, and practice.
Remember these key points:
Start with clean artwork
Keep designs simple
Use basic stitch types
Add underlay
Test before final run
Free tools are great for learning and small jobs. For complex or business projects, expert digitizing may save time and money in the long run.
With smart steps and honest effort, you can create clean and smooth stitch files without spending money. And when you need advanced support, trusted professionals can help ensure your embroidery looks sharp, bold, and professional every time.